

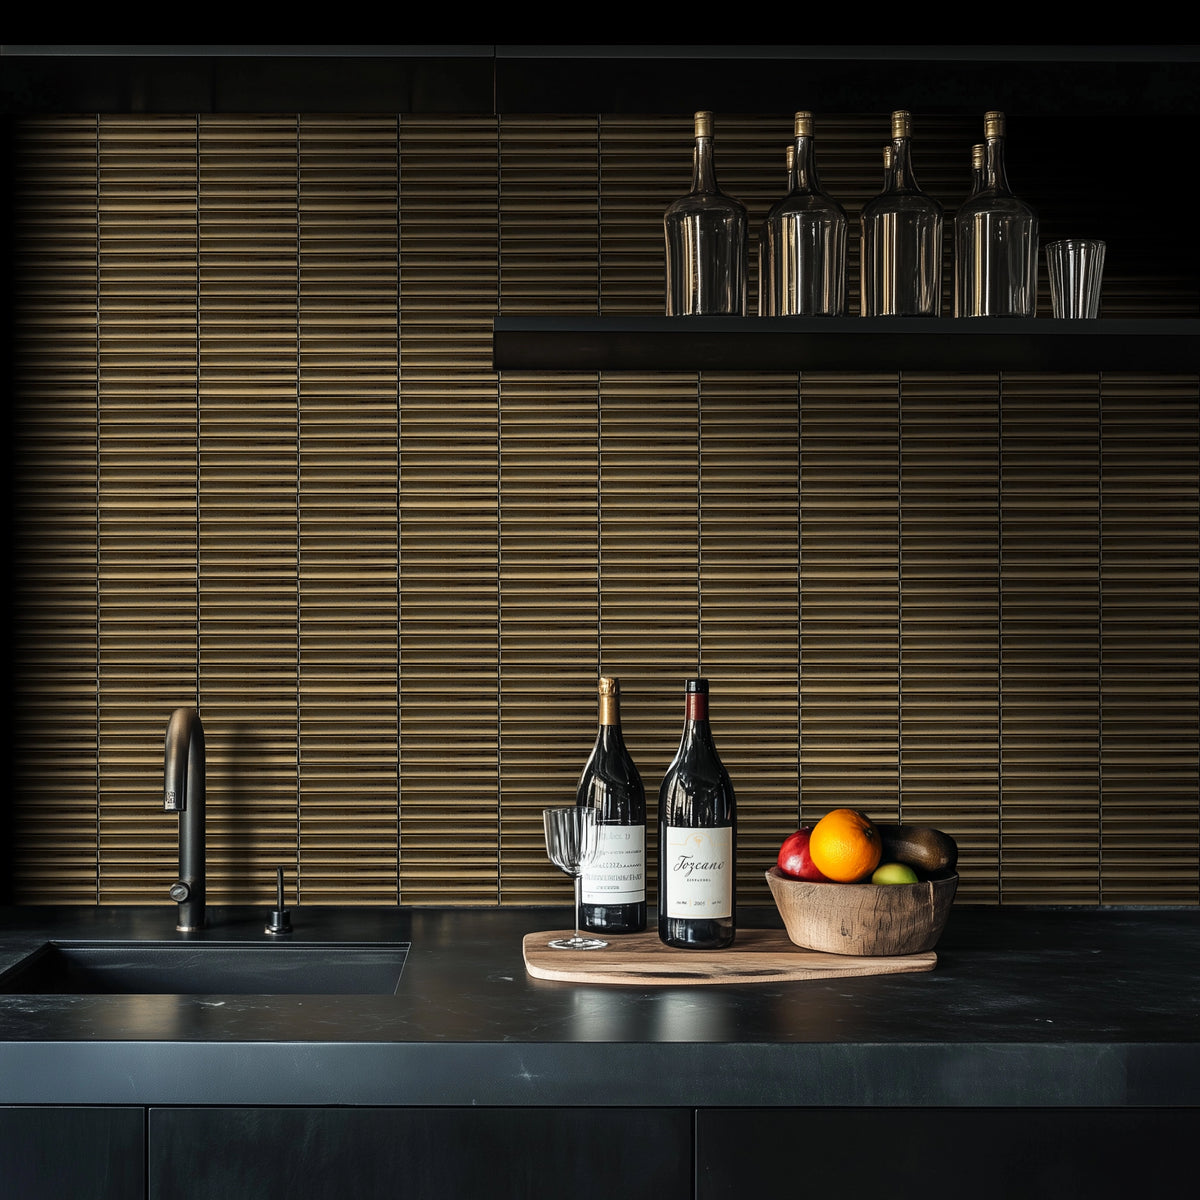
Article: Checkerboard Tile Layout Guide: Straight, Diagonal, Border, and Micro-Check Patterns
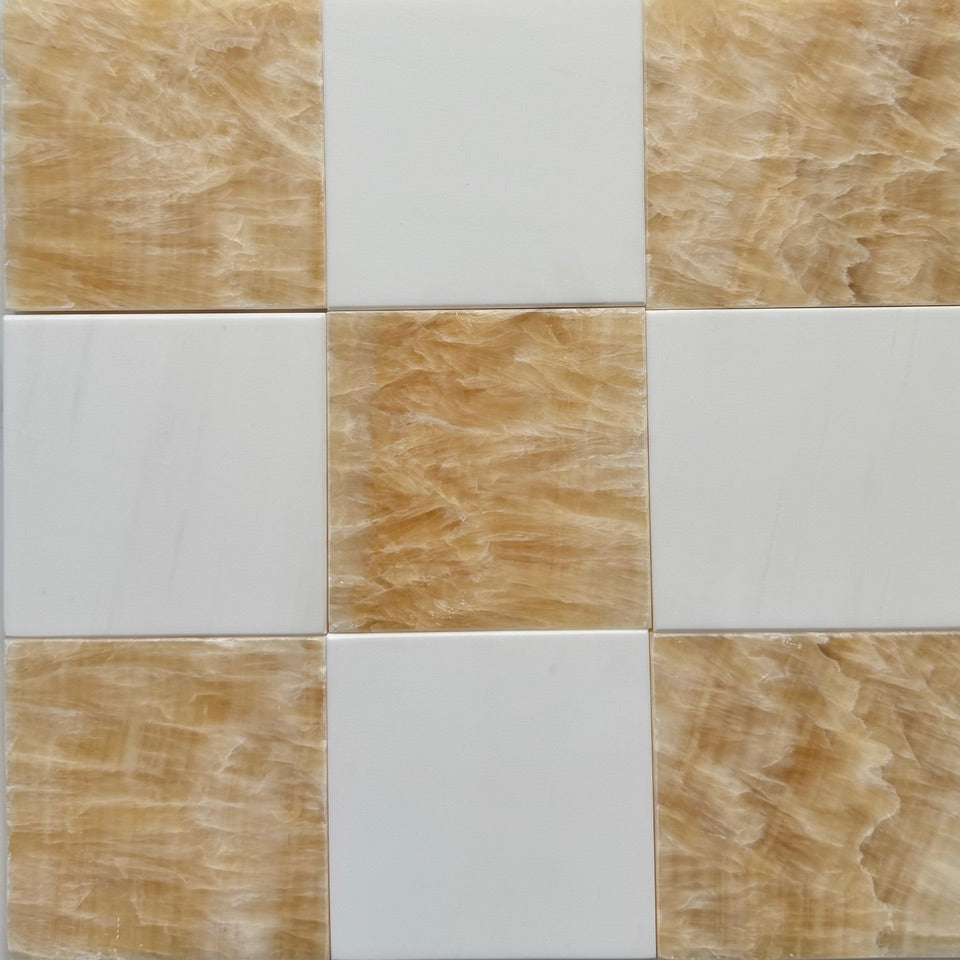
Checkerboard Tile Layout Guide: Straight, Diagonal, Border, and Micro-Check Patterns
Checkerboard tile is one of the most recognizable patterns in interior design. Its alternating squares can feel traditional, contemporary, European, playful, or highly architectural depending on the tile size, color combination, material, and layout direction.
The most important checkerboard design decision is not only which two colors to use, but also how the pattern will be positioned within the room.
A straight checkerboard creates an orderly grid. A diagonal layout introduces movement. A framed border makes the installation feel more formal, while a micro-check pattern creates a smaller and more decorative rhythm.
This guide explains the most popular checkerboard tile layouts, how each pattern changes the appearance of a room, and what to consider before ordering and installing the material.
What Is a Checkerboard Tile Pattern?
A checkerboard tile pattern is created by alternating two colors in a repeating square grid. Each tile is surrounded horizontally and vertically by tiles of the opposite color.
The classic combination is black and white, but checkerboard installations can also use:
- Green and white
- Terracotta and ivory
- Beige and brown
- Blue and cream
- Gray and white
- Marble and limestone
- Two complementary Zellige colors
- Contrasting porcelain colors
The pattern can be made from natural marble, limestone, travertine, porcelain, ceramic, Zellige, or other suitable tile materials.
Why Layout Direction Matters
The orientation of a checkerboard pattern affects how the room feels.
A straight layout reinforces the geometry of the walls and cabinetry. A diagonal layout creates more movement and may make the room appear wider. A border creates a framed composition, while smaller checks can make the surface feel more detailed and decorative.
Before choosing a layout, consider:
- The dimensions and shape of the room
- The position of doors and openings
- The direction of cabinetry or built-ins
- The location of focal points
- The tile size
- The amount of perimeter cutting
- The desired level of formality
- The amount of material available
Straight Checkerboard Layout
In a straight checkerboard layout, the tile edges run parallel to the walls. The checks form an orderly grid across the floor or wall.
This is the most direct and architectural way to install a checkerboard pattern.
Why Choose a Straight Layout?
- Creates a clean and structured appearance
- Aligns naturally with walls and cabinetry
- Works well in modern and traditional interiors
- Usually requires fewer complex perimeter cuts
- Makes it easier to coordinate with room dimensions
- Allows the color combination to remain the main focus
Best Rooms for a Straight Checkerboard
- Kitchens
- Bathrooms
- Mudrooms
- Laundry rooms
- Entryways
- Commercial corridors
- Retail and hospitality spaces
A straight layout is especially effective in rooms with strong architectural lines, such as kitchens with long cabinet runs or bathrooms with symmetrical fixtures.
Diagonal Checkerboard Layout
In a diagonal checkerboard layout, the pattern is rotated approximately 45 degrees so the corners of the tiles point toward the walls.
This creates a diamond-shaped visual effect and introduces more movement than a straight layout.
Why Choose a Diagonal Layout?
- Creates a more dynamic and traditional appearance
- Can make a narrow room feel broader
- Draws the eye across the space
- Works well in entryways and formal interiors
- Adds movement to simple square tiles
- Can make the pattern feel more European or historic
Best Rooms for a Diagonal Checkerboard
- Foyers
- Entry halls
- Powder rooms
- Galley kitchens
- Long corridors
- Conservatories
- Boutique hospitality spaces
Diagonal installations typically require more perimeter cuts and may produce more waste than straight layouts. Accurate planning is important because small layout changes can significantly affect the size of the edge pieces.
Straight vs. Diagonal Checkerboard
| Feature | Straight Layout | Diagonal Layout |
|---|---|---|
| Appearance | Orderly and architectural | Dynamic and decorative |
| Visual Effect | Reinforces room geometry | Creates movement and width |
| Installation | Generally more straightforward | Requires more planning and cutting |
| Material Waste | Usually lower | Usually higher |
| Best For | Kitchens, bathrooms, modern interiors | Foyers, corridors, formal spaces |
Checkerboard Tile with a Border
A border frames the checkerboard field and separates it from the surrounding walls, cabinetry, or flooring.
This layout is often used in traditional foyers, bathrooms, kitchens, and formal rooms where a more finished and deliberate composition is desired.
Border Options
- Single-color tile border
- Double-line border
- Contrasting stone strip
- Decorative mosaic border
- Matching perimeter tile
- Natural stone trim or liner
A border can also help resolve uneven room dimensions by allowing the checkerboard field to remain centered while the perimeter adjusts to the walls.
When a Border Works Best
- The room has a clear central field
- The space is formal or symmetrical
- The checkerboard should feel like an inset rug
- The walls are not perfectly square
- The perimeter cuts would otherwise be very narrow
- The design includes coordinating trim pieces
The border width should be proportional to the tile size and room dimensions. A narrow border may feel delicate, while a wider border creates a stronger frame.
Micro-Check Checkerboard Pattern
A micro-check pattern uses smaller square tiles to create a tighter and more detailed checkerboard effect.
This format can feel playful, historic, graphic, or highly decorative depending on the material and color combination.
Best Applications for Micro-Check Tile
- Powder room floors
- Bathroom floors
- Shower walls where approved
- Kitchen backsplashes
- Fireplace surrounds
- Bar fronts
- Decorative wall panels
Advantages of Micro-Check Patterns
- Creates detailed visual texture
- Works well in small spaces
- Can make bold colors feel more balanced
- Adds more grout joints to the installation
- Offers a vintage or mosaic-like appearance
Because micro-check patterns contain many small pieces, careful sheet alignment and grout consistency are important.
Large-Format Checkerboard Tile
Large-format checkerboard tile creates a bold, architectural statement. The larger squares reduce the number of grout joints and allow natural stone veining or porcelain surface detail to become more visible.
Best Applications for Large Checks
- Spacious kitchens
- Large foyers
- Open-plan living areas
- Commercial lobbies
- Hospitality spaces
- Retail interiors
Large checks need sufficient room to develop. In a compact space, only a small number of full squares may be visible, which can weaken the overall pattern.
Before ordering, calculate how many complete checks will fit across the room and how the pattern will terminate at walls and cabinetry.
Checkerboard Tile as an Inset Rug
A checkerboard inset can be installed as a tile “rug” within a larger field of stone, porcelain, or wood-look tile.
This approach defines a particular area while keeping the surrounding surface quieter.
Good Locations for an Inset Checkerboard
- Entryways
- Kitchen islands
- Dining areas
- Bathroom vanities
- Fireplace zones
- Hotel reception areas
An inset checkerboard usually works best with a border or transition strip that clearly separates the pattern from the surrounding material.
Checkerboard Backsplash Layouts
Checkerboard tile is not limited to floors. It can also create a highly distinctive kitchen, bar, bathroom, or fireplace wall.
Straight Backsplash Layout
A straight grid feels clean and graphic. It works particularly well when the tile aligns with cabinetry, countertops, or shelving.
Diagonal Backsplash Layout
A diagonal layout creates more movement and may feel traditional or playful. It generally requires more cutting around outlets, corners, and cabinet edges.
Framed Checkerboard Backsplash
A border can define the checkerboard behind a range, sink, bar, or vanity. This creates a decorative panel rather than covering the entire wall.
Micro-Check Backsplash
A small checkerboard backsplash creates detailed texture and can work especially well in compact kitchens, powder rooms, and bar areas.
Checkerboard Tile for Kitchens
Checkerboard tile can create a strong visual foundation in a kitchen.
A straight layout works well with orderly cabinet lines, while a diagonal pattern can add movement to a long or narrow floor.
Suitable kitchen combinations include:
- Green and white tile with natural wood cabinets
- Terracotta and ivory tile with cream cabinets
- Black and white marble with dark-stained cabinetry
- Beige and brown stone with warm oak
- Blue and white tile with painted millwork
Keep countertops and backsplashes relatively restrained when the floor is highly patterned.
Checkerboard Tile for Bathrooms
Bathrooms can support either bold or subtle checkerboard layouts.
A small straight checkerboard may feel crisp and classic. A diagonal marble checkerboard can create a more historic atmosphere, while a micro-check mosaic may feel playful or vintage-inspired.
For wet areas, confirm that the selected material, finish, tile size, and installation system are approved for the intended application.
Smaller tiles create more grout joints, while larger tiles may require careful slope and substrate planning.
Checkerboard Tile for Entryways
Entryways are one of the most traditional locations for checkerboard flooring.
A diagonal pattern can create a formal European appearance, while a straight layout feels cleaner and more contemporary.
A border can help define the entry and separate it from adjoining wood or stone flooring.
Consider the direction from which the pattern will first be viewed. The layout should feel balanced from the primary entrance and from adjoining rooms.
Checkerboard Tile for Mudrooms and Laundry Rooms
Checkerboard tile can bring personality to practical spaces such as mudrooms and laundry rooms.
Porcelain is often selected for these locations because of its durability and maintenance characteristics.
Softer color pairings, such as sage and ivory or beige and cream, can create pattern without making the room feel overly formal.
Choosing the Right Checkerboard Tile Size
The size of the checks should relate to the scale of the room.
Small Rooms
Smaller or medium checks often work best in powder rooms, compact bathrooms, and small entryways.
Medium Rooms
Medium-format square tiles are versatile for kitchens, bathrooms, laundry rooms, and mudrooms.
Large Rooms
Large-format squares can create a dramatic effect in open kitchens, foyers, and commercial spaces.
Before selecting the size, sketch the pattern or create a scaled layout showing the number of checks that will fit across the room.
How to Center a Checkerboard Pattern
A centered layout generally looks more intentional than one that starts with a full tile against one wall and leaves a narrow cut at the opposite side.
The installer should identify:
- The visual center of the room
- The primary viewing direction
- The position of doors and openings
- The alignment with cabinetry or fixtures
- The size of the perimeter cuts
The mathematical center of the room is not always the best visual center. Cabinetry, islands, doorways, and focal walls may shift the apparent center.
Avoiding Narrow Perimeter Cuts
Very narrow tile pieces along walls can appear unfinished and may be more difficult to install securely.
To avoid narrow cuts:
- Measure the room carefully.
- Dry-lay or mark several rows.
- Check the size of the cuts on opposite walls.
- Shift the layout so the perimeter pieces are balanced.
- Consider adding a border if necessary.
Room walls are not always perfectly straight or square, so field measurements should be taken in several locations.
Starting with the Dark or Light Tile
In most checkerboard installations, the starting color is a design decision rather than a technical requirement.
Consider placing the more visually dominant color at important locations such as:
- The center of a foyer
- The centerline of a doorway
- The front edge of a kitchen island
- The center of a decorative wall panel
- The main focal point of a room
Preview both options before installation. Reversing the starting color can subtly change the overall composition.
Choosing Grout for Checkerboard Tile
Grout color affects how strongly the pattern is defined.
Light Grout
Light grout blends with the lighter tile but may create more visible outlines around the darker tile.
Dark Grout
Dark grout blends with the darker tile while creating stronger outlines around the lighter pieces.
Warm Gray or Neutral Grout
A medium neutral often provides the most balanced result because it does not fully match either color.
Test grout samples against both tile colors before installation. Natural stone may require sealing before grouting to reduce the risk of pigment absorption.
Natural Stone Checkerboard Tile
Natural stone creates a checkerboard pattern with unique veining, color movement, and tonal variation.
Marble, limestone, travertine, and onyx combinations can feel richer and more dimensional than highly uniform materials.
However, natural stone should be inspected, dry-laid, and blended before installation.
Natural Stone Considerations
- No two tiles will be exactly alike
- Veining and shade will vary
- Tiles may require sealing
- Some stones are more porous than others
- Finish affects color and maintenance
- Additional material may be needed for blending
Porcelain Checkerboard Tile
Porcelain offers consistent sizing, predictable thickness, and generally straightforward maintenance.
It can create a crisp graphic pattern or imitate the appearance of marble, limestone, terracotta, or cement tile.
Porcelain Considerations
- Review slip ratings and approved applications
- Confirm whether the tile is rectified
- Check production-batch color consistency
- Review recommended grout-joint width
- Order extra material for cuts and future repairs
Zellige Checkerboard Tile
Zellige checkerboards combine an alternating-color pattern with glossy glaze, irregular edges, and handmade Moroccan character.
The result is softer and more artisanal than a perfectly uniform machine-made checkerboard.
Arda Ogan’s Signature Checkerboards™ use carefully selected Zellige color pairings for decorative wall applications.
Because Arda Ogan’s current Zellige collection is intended for wall use, product-specific application guidance should be reviewed before installation.
How Much Extra Checkerboard Tile Should You Order?
Checkerboard projects require additional material for cutting, breakage, pattern alignment, color balance, and future repairs.
- Order approximately 10%–15% additional material for a straightforward straight layout.
- Consider approximately 15%–20% additional material for diagonal layouts, borders, complex rooms, or installations with many cuts.
- Highly variable natural stone may require additional material for color and veining selection.
Both colors should be ordered in sufficient quantities. Do not calculate the total square footage and assume the colors will divide perfectly without accounting for layout and cuts.
How to Calculate Two Checkerboard Colors
In a simple checkerboard field, approximately half of the area will use one color and half will use the other.
However, actual quantities may vary because of:
- Perimeter cuts
- Borders
- Doorways
- Irregular room shapes
- The starting color
- Natural stone selection
- Replacement material needs
For example, after calculating the total project area and adding the appropriate overage, the installer or designer should determine how the layout affects the quantity of each color.
Do not order exactly 50% of each color without reviewing a layout drawing.
Dry-Laying Before Installation
Dry-laying is especially important for checkerboard projects.
Before adhesive is applied:
- Open several boxes of both colors.
- Inspect the tiles for shade and size variation.
- Mark the room’s centerlines.
- Lay several rows in both directions.
- Check the perimeter cuts.
- Confirm the starting color.
- Review the pattern from the main entrance.
- Blend natural stone variation throughout the field.
Installation generally indicates acceptance of the material and layout.
Common Checkerboard Layout Mistakes
Starting Against One Wall Without Planning
This may create a full tile on one side and a very narrow cut on the other.
Ignoring the Primary Viewpoint
A pattern may be mathematically centered but appear visually off-center from the main doorway.
Ordering Exactly the Measured Square Footage
This leaves no material for cuts, breakage, natural variation, or future repairs.
Installing One Box at a Time
This may create visible concentrations of shade or veining, particularly with natural stone.
Choosing Tile Size Without Measuring the Pattern
An oversized check may not fully develop in a small room.
Failing to Test Grout
Grout can alter the contrast and perceived color of both tiles.
Using Polished Tile in an Inappropriate Wet Area
Highly polished surfaces may be slippery when wet. Product specifications should be reviewed before installation.
Frequently Asked Questions
Is a straight or diagonal checkerboard better?
A straight checkerboard feels orderly and architectural, while a diagonal checkerboard creates more movement and may make a narrow room feel wider. The best choice depends on the room and desired design style.
Does diagonal checkerboard tile make a room look bigger?
A diagonal layout can visually expand a narrow or compact room because the pattern draws the eye toward the corners. Actual results depend on tile size, room shape, and color contrast.
Does a diagonal checkerboard require more tile?
Usually, yes. Diagonal installations require more perimeter cutting and generally create more waste than straight layouts.
What size checkerboard tile is best for a small bathroom?
Small or medium-format squares often work best because they allow enough of the pattern to remain visible. The exact size should be evaluated against the room dimensions.
Can checkerboard tile be used on a backsplash?
Yes. Checkerboard tile can create a distinctive kitchen backsplash, bar wall, vanity backsplash, fireplace surround, or decorative feature panel.
Should checkerboard tile have a border?
A border is optional. It works well when the checkerboard should resemble an inset rug, when the room is formal, or when a framed field helps resolve difficult perimeter cuts.
What is a micro-check tile pattern?
A micro-check pattern uses small alternating square tiles to create a tighter and more detailed checkerboard effect.
How much extra checkerboard tile should I order?
Approximately 10%–15% additional material is generally recommended for straight layouts. Diagonal, bordered, highly variable, or complex installations may require approximately 15%–20% additional material.
Should checkerboard tile be centered in the room?
It should generally be visually balanced, but the best center may be determined by doorways, cabinetry, islands, fixtures, and focal points rather than the room’s mathematical center alone.
Can marble and porcelain be combined in one checkerboard pattern?
Combining different materials may be possible, but thickness, edge profile, finish, dimensional consistency, maintenance, and installation requirements must be carefully evaluated.
Explore Checkerboard Tile Collections
Arda Ogan Tile Store offers natural stone, porcelain, ceramic, and handmade Zellige checkerboard tile for kitchens, bathrooms, entryways, feature walls, residential interiors, and professionally designed projects.
Browse our collections, request samples, or contact our team for assistance with color combinations, tile sizes, pattern layouts, material quantities, custom production, and project pricing.


Leave a comment
This site is protected by hCaptcha and the hCaptcha Privacy Policy and Terms of Service apply.